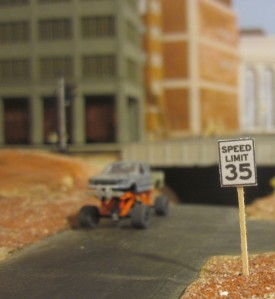
Signs are everywhere, and including them on your model railroad is essential to realistic scenes.
I went on a little sign binge on the FCFL recently and I’m pretty happy with the results.
There’s nothing groundbreaking or difficult in my approach to sign making: I went online and searched images of the signs I wanted, pasted the images into Word, resized them to N-scale, and printed them on my inkjet printer.
According to The Internet, the accuracy of which I trust unwaveringly, standard sign sizes are:
Speed limit signs – 24″ x 48″, 36″ x 72″ or 48″ x 96″.
Stop signs – 18″, 24″ or 36″.
I divided the dimensions by 160 (N-scale) and told Word to resize 24″ signs to .15″ wide, 36″ signs to .23″, and 48″ signs to .3″.
I printed most of the speed limit signs 36″ wide. I think they’re a little big but I’m going to live with them awhile and see what visitors think.
The 36″ stop signs I printed were way too huge, but I found the octagon shape got distorted if I printed them much smaller. I went with 24″ stop signs mostly, but I had to fix the shape when I trimmed them.
To simulate the primed aluminum most road signs are made of, I laminated the white printer paper to gray or tan colored construction paper using Elmer’s spray adhesive. I carefully trimmed the signs out with sharp scissors.
My signposts are mostly scale 4×4 basswood, but in a few cases I used some 28 gauge and finer wire. I glued the signs to the wood or wire with CA, then cut the post a good inch long or more. I drilled matching sized holes in the scenery and secured the signs with white glue.
I may come back at a later date and weather some of these with an India ink wash. For future signs I might also soak the basswood signposts in an India ink/alcohol solution to make them look aged. These all look brand new, and they don’t look pressure treated.
This is a fun detail project that doesn’t take a huge amount of time, skill or materials, but the added realism is immense.


Good job!
Thank you!